Amazon Connect Integration - Manual - with firehose
- Patrick Hernandez
Analytics
This is a guide for integrating an Amazon Connect Instance with eMite. This involves the deployment of several additional components on your AWS Cloud, such as Kinesis streams, firehose and elasticsearch.
This guide assumes all components will be deployed in the same region as the Amazon Connect instance, and also all under the same AWS Account.
Components Overview
- IAM Policies/Roles
- A policy will be created to allow read access to Kinesis Stream and Amazon Connect
- Policies will be attached to an IAM Role that eMite will use to get data from Streams and Amazon Connect
- If the eMite server will be deployed on your AWS Account, this role will be attached to the EC2 server directly
- If not, eMite team will assume the IAM Role via AWS Security Token Service (STS)
- Kinesis Stream
- Amazon Connect will be configured to send Agent Events data to a stream
- Kinesis Firehose
- Sends the Amazon Connect Contact Trace Records to an AWS Elasticsearch domain
- AWS Elasticsearch Service
- Stores Contact Trace Record data, as well as queue observations and queue metrics/history data.
eMite Server deployment (If self-hosted)
*Note: Please skip this section if eMite server will not be deployed on your AWS cloud.
- EC2 Instance Details
- AMI: Microsoft Windows Server 2016 Base
- Instance Size: r5.large
- Note: larger instance size may be needed depending on factors such as the number of agents or concurrent active dashboards. You can also increase the instance size later via AWS Console.
- Subnet: Assign the server to a public subnet
- Auto-Assign Public IP: disable
- Storage: At least 100GB
- Security Group Settings:
- RDP – to allow us access to the servers for eMite installation/configuration
- Your Office IP
- eMite Office IPs:
- 60.241.25.74/32
- 54.79.101.24/32
- 13.238.169.116/32
- Note: If your security policy does not allow direct external RDP access, our team can work with you through your preferred remote access solution (e.g. VPN, Webex Remote session, etc.)
- HTTP/HTTPS – 0.0.0.0/0
- RDP – to allow us access to the servers for eMite installation/configuration
- After launch, create an Elastic IP and attach it to the EC2 server
- This will be referred to as eMite server external IP
- Additional prerequisites after server is launched:
- SQL Server 2017 and above – Express Edition
- Windows Server Roles: Web Server IIS
- Local administrator account access for eMite team – to be used for installation/configuration
- Note: If your security policy does not allow direct external RDP access, we do have a silent installation option that installs eMite and all its prerequisite software such as SQL Server. Please contact our team at support@prophecyinternational.com to discuss further.
AWS Elasticsearch Service
Stores Contact Trace Record data, as well as queue observations and queue metrics/history data.
Please ensure that the AWS Domain is created on the same region used for AWS Connect.
- Create AWS Domain on the same region used for AWS Connect
- Open the AWS Console, go to the same region used for AWS Connect
- Open up Elasticsearch Service from the Service tab
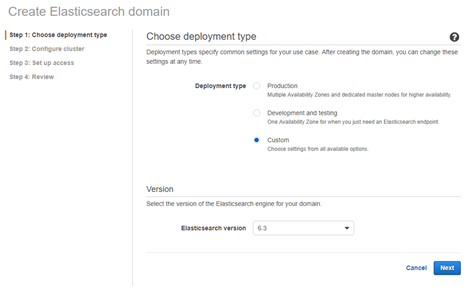
- Click Create New Domain
- Choose a Deployment Type
- Deployment Type: Custom
- Version: 6.3
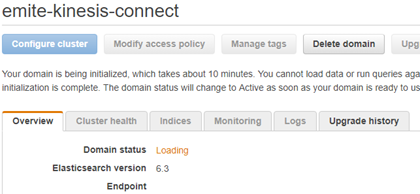
- Configure Cluster
- Domain Name: emite-kinesis-connect

- You can use a custom name if you prefer.
- For this guide, we'll use emite-kinesis-connect as example
- Data Instances:
- 1-AZ
- Instance Type: m5.large
- Number of instances: 1

- Dedicated Master Instances: Disabled
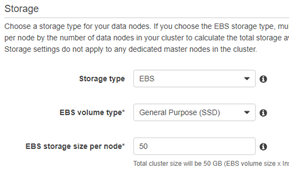
- Storage:
- Type: EBS
- Volume Type: SSD
- EBS Storage Size: 50GB
- Leave the other options as is, click next
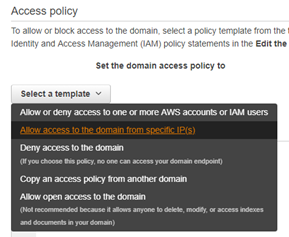
- Set Up Access
- Network Configuration: Public Access
- Access Policy: Select Allow access to the domain from specific IPs
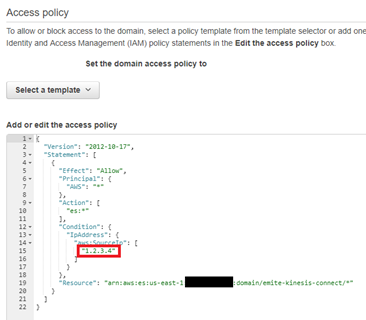
- Add the eMite External IP
- Note: If eMite EC2 server will not be deployed on your account - this external IP will be provided by eMite team
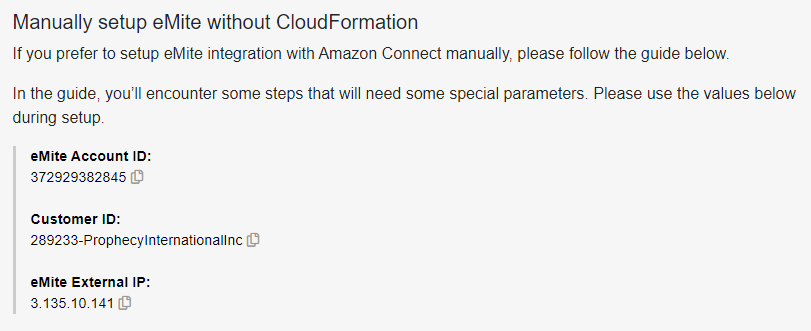
- *For AWS Marketplace customers, you can get this value from the Manual setup section of the onboarding page:
- After entering the IP, you should now have a policy like below:
- Sample IP below (1.2.3.4)
- Domain Name: emite-kinesis-connect
- Click Next to review and Launch the Elasticsearch Domain
- It will take some time to finish launching the domain.
Kinesis Stream setup
Please ensure that the Kinesis Stream is created on the same region used for AWS Connect.
Agent Events Stream
- Open the AWS Console, go to the same region used for AWS Connect
- Go to Kinesis Service.
- If this is your first time using Kinesis on this region, click Get Started
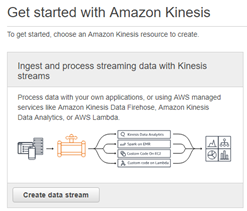
- Click Create data stream:
- Kinesis stream name: connect-agentevents
- Shards: 1

- Click Create Stream
- Go back to Dashboard, you should now see connect-agentevents under Kinesis data streams
Kinesis Firehose setup
Please ensure that the Kinesis Firehose is created on the same region used for AWS Connect.
Contact Trace Records Firehose
- Open the AWS Console, go to the same region used for AWS Connect
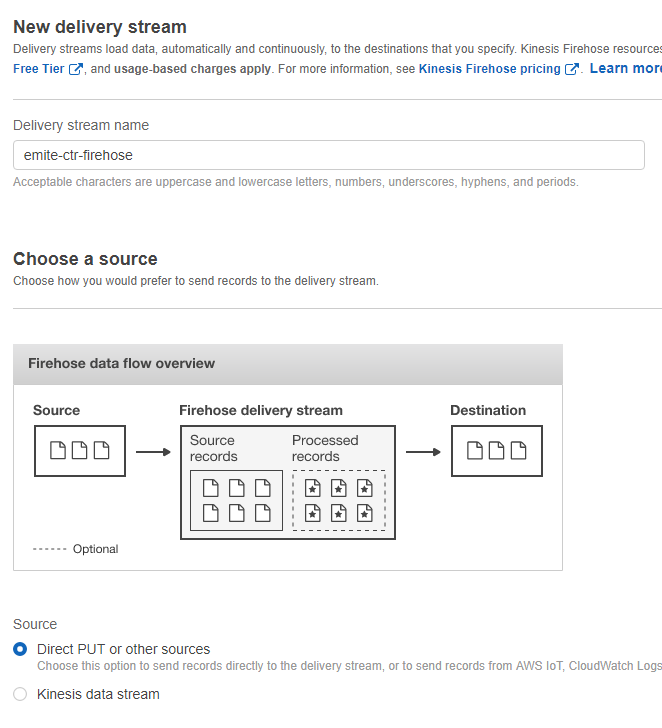
- Click Create delivery stream
- Name and Source:
- Delivery Stream Name: emite-ctrfirehose
- Source: Direct PUT or other sources
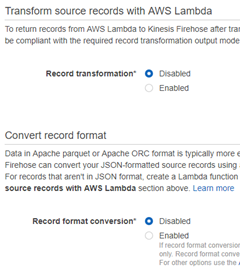
- Process Records:
- Record Transformation: disabled
- Convert Record format: disabled
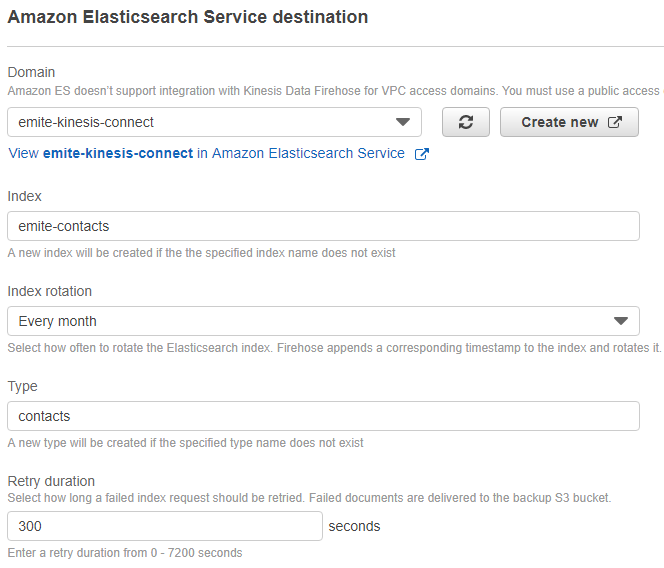
- Destination:
- Select: AWS Elasticsearch Service
- Domain: select the emite-kinesis-connect domain created earlier
- If this domain is still not available, please
- Index: emite-contacts
- Index Rotation: every month
- Type: contacts
- S3 Backup Mode: Failed records only
- Backup S3 Bucket: select one of your S3 buckets that will be used to store the failed records. In the below example, we use “syd-cloudbackup”
 It seems
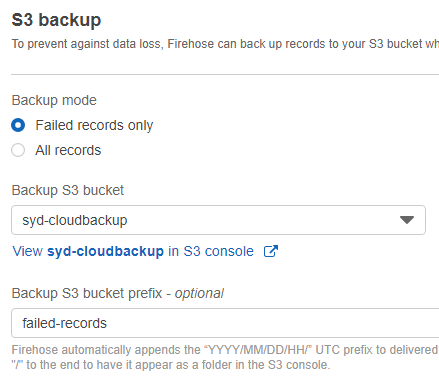
- Configure Settings:
- Elasticsearch buffer conditions: Use default settings
- S3 Compression and Encryption: Use default settings
- Error Logging: Enabled
- Tags: Optional, can be left blank
- IAM Role:
- Click Create New or Choose
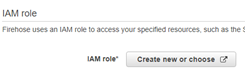
- This will open a new window for creating the IAM role needed by Kinesis Firehose to implement the delivery stream
- IAM Role: Create a new IAM Role
- Role Name: emite-ctrfirehose-role
- Click Allow
- Review Settings
- Click Create delivery stream
IAM Policy/Role Setup
Policies will be used to allow read access to Kinesis Stream and Amazon Connect. These policies will then be attached to an IAM Role that eMite will use to get data from Streams and Amazon Connect.
Policy allowing access to the Kinesis Stream, and the Amazon Connect instance
- Open AWS Console, go to IAM under the services tab
- Policy Creation:
- Go to Policies > Create Policy
- Go to the JSON tab
Copy the below policy document:
- Replace KinesisStreamARN with the ARN of the Agent Events Kinesis Stream created in the previous section
- To view the ARN, open a new console window and go to Kinesis > select the stream under Kinesis data streams (connect-agentevents in this example)
- On the Details tab, copy the Stream ARN
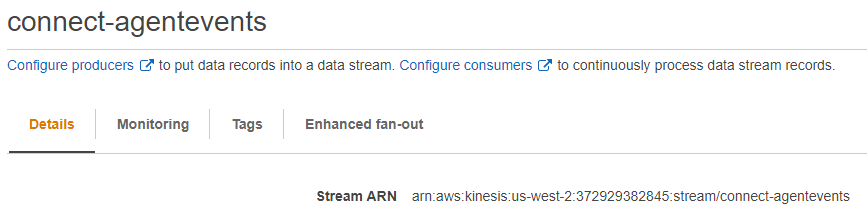
- To view the ARN, open a new console window and go to Kinesis > select the stream under Kinesis data streams (connect-agentevents in this example)
- Replace AmazonConnectInstanceARN with ARN of the Amazon Connect instance
- To view the ARN, open a new console window and go to Amazon Connnect > select your Amazon Connect instance
- On the overview tab, copy the Instance ARN

- To view the ARN, open a new console window and go to Amazon Connnect > select your Amazon Connect instance
- Click Review Policy
- Policy Name: emite-role-policy
- Click Create Policy
IAM Role setup
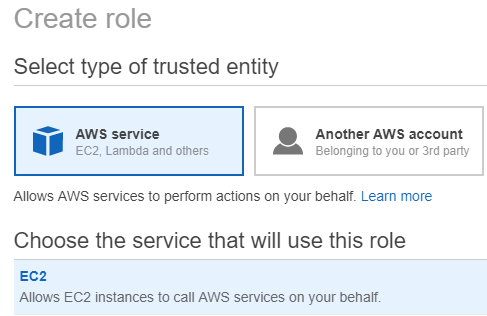
- Go to Roles > Create Role
- Select Type of entity: AWS Service
- Service that will use the role: EC2
- Permissions:
- Select emite-role-policy
- You can skip adding tags
- Review:
- Role Name: emite-role
- Role Description: Role for eMite EC2 server
- Click Create Role
Increase Maximum CLI/API session time:
- Go to Roles
- Click the emite-role
- Click Edit beside the Maximum CLI/API session duration
- Set the duration to 12 hours then click Save changes:

- The setting affects the amount of time for each session that uses a set of API keys provided by the IAM role.
- For the Kinesis adapter in particular, each time the session expires, the adapter will poll back some data to establish agent activity.
- Shorter session times would put more load on the adapter, and adds overhead.
If eMite EC2 to be deployed in your AWS account:
Attach Role to EC2
- Go to EC2 > Instances
- Right-click the eMite EC2 instance, select Instance Settings > Attach/Replace IAM Role

- Choose the emite-role role, click Apply
If eMite EC2 will not be deployed in your AWS account:
Edit Trust Relationship on emite-role
- Trust relationship will be modified to allow assume role from eMite AWS
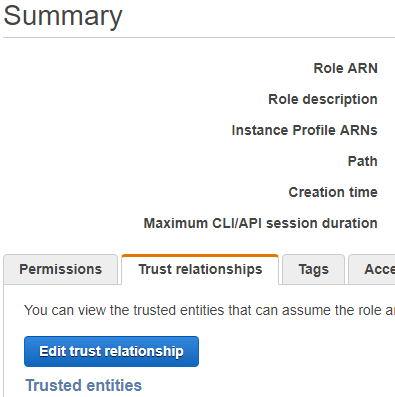
- Go to Roles
- Click the emite-role
- Under the Trust Relationship tab, click Edit Trust Relationship
- This will load a policy document
- Modify Trust Relationship document
- Replace the contents with the policy document below:
- Replace EmiteAccountID with eMite Account ID sent to you by eMite team
- Replace CustomerID with Customer ID sent to you by eMIte team
- *For AWS Marketplace customers, you can get these values from the Manual setup section of the onboarding page:
- Click Update Trust Policy
Enable Amazon Connect Data Streaming
Now that the Kinesis Stream and Firehose have been setup, we can now
- Go to Amazon Connnect > select your Amazon Connect instance
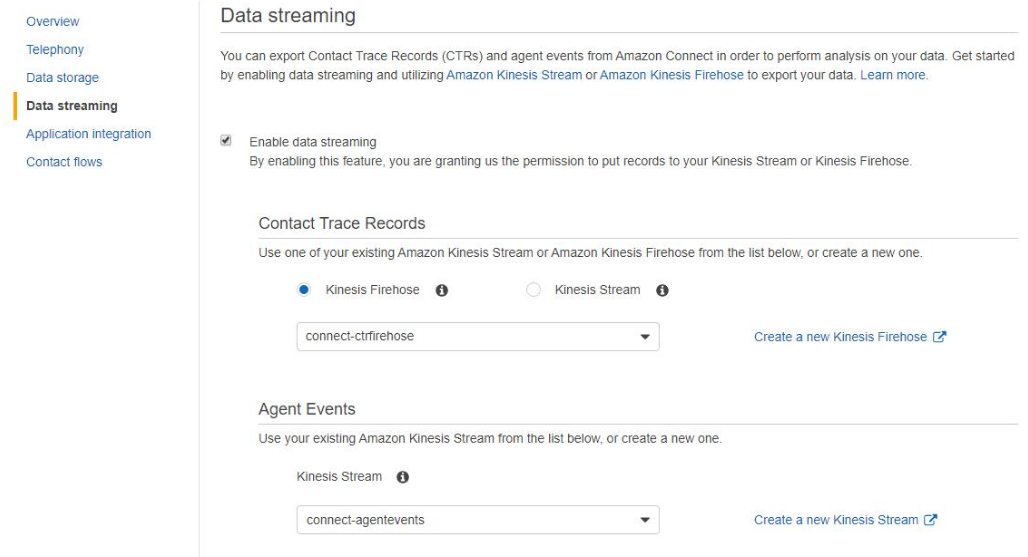
- Go to Data Streaming
- Tick Enable data streaming
- Contact Trace Records
- Select Kinesis Firehose
- Select connect-ctrfirehose
- Agent Events
- Select Kinesis Stream
- Select connect-agentevents
(Optional) - Add eMite to Application Integration
This step is optional for integrating Amazon Connect Chat with eMite.
To enable this, you would need to add the domain of the eMite server to the list of approved origins
- Go to Amazon Connnect > select your Amazon Connect instance
- Go to Application Integration
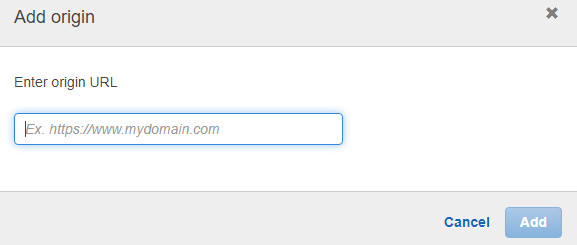
- Click Add Origin
- You will be prompted to add a specific origin URL
If eMite EC2 to be deployed in your AWS account:
- Input the access URL of the eMite application
- E.g. https://emite.yourcompanydomain.com
If eMite EC2 will not be deployed in your AWS account:
- Input the access URL depending on your region:
- US East region: https://useast-cloud.emite.com
- US West region: https://uswest-cloud.emite.com
- Asia Pacific (Sydney): https://au-cloud.emite.com
- Asia Pacific (Tokyo): https://jp-cloud.emite.com
- EU Frankfurt: https://eucentral-cloud.emite.com
Send to eMite team
Please send the below data to eMite team:
- eMite EC2 details (only if server will be deployed on your AWS account)
- eMite EC2 external IP
- RDP credentials
- EmiteRole ARN
- Go to IAM Roles
- Click the emite-role role
- Copy the Role ARN

- Go to IAM Roles
- Amazon Connect Instance ARN
- Go to Amazon Connnect > select your Amazon Connect instance
- On the overview tab, copy the Instance ARN
- Kinesis Stream ARN
- To view the ARN, open a new console window and go to Kinesis > select the stream under Kinesis data streams (connect-agentevents in this example)
- On the Details tab, copy the Stream ARN
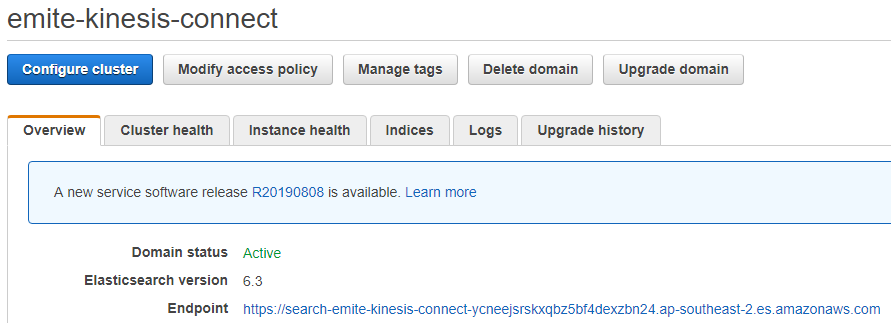
- Elasticsearch Endpoint URL
- Go to Elasticsearch > emite-kinesis-connect domain
- Copy the Endpoint
- Preferred Time Zone
- Please send us your preferred timezone in IANA format
- Common Timezones
- Australia/Sydney
- Europe/Dublin
- Europe/Berlin
- Asia/Tokyo
- America/New_York
- America/Los_Angeles
- Additional Timezones can be found here: