HOW TO: Set up S3 Repository for AWS Elasticsearch
By default, AWS Elasticsearch takes a daily snapshot of all indices. However, these snapshots are not accessible outside the elasticsearch domain.
This guide is for setting up an S3 repository for AWS Elasticsearch Service.
Since the elasticsearch snapshots will be stored on an S3 bucket/folder, you can grant/control access to this repository.
This is particularly useful for sharing elasticsearch data to eMite for testing/troubleshooting purpose, or for taking an elasticsearch backup right before a major ES version upgrade.
Prerequisites
- Login as an AWS administrator account
- We reccommend using an administrator account to ensure you have the necessary permissions.
- You will be creating an IAM role, IAM policy, IAM user and an S3 bucket/folder.
- AWS Elasticsearch Service
- If you're using AWS Connect integration, this is the elasticsearch service that stores the AgentEvents and CTR data.
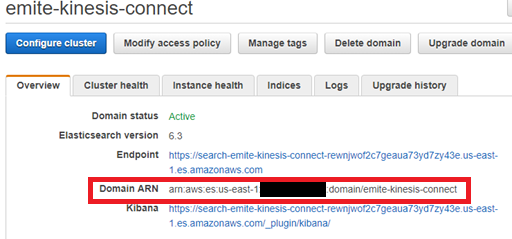
- Take note of the elasticsearch arn by going to Elasticsearch Service > Domains
- If you're not sure of which AWS ES Domain is used - please reach out to eMite team and they will give you the domain name.
- Example:
-
Create S3 Backup Location
- Create an S3 bucket in the same region as the Elasticsearch Service
- Note: You can also use an existing bucket in the same region if you prefer.
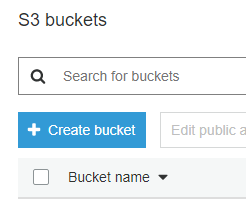
- Go to AWS Console > S3
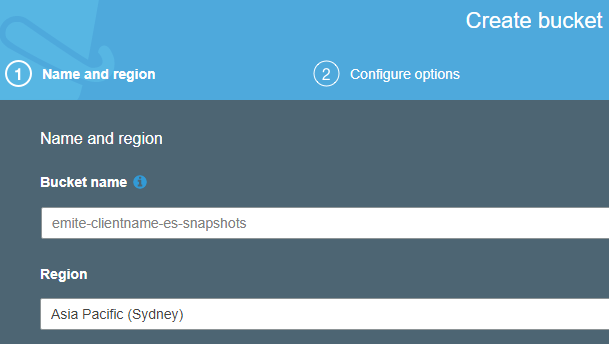
- Click Create Bucket:
- Name and Region
- Bucket Name
- Example format: emite-<clientname>-es-snapshots
- Region (the same region as your elasticsearch service)
- Example: Asia Pacific (Sydney)
- Bucket Name
- Skip Configure Options
- Just click Next
- Block All Public Access
- This is the default option
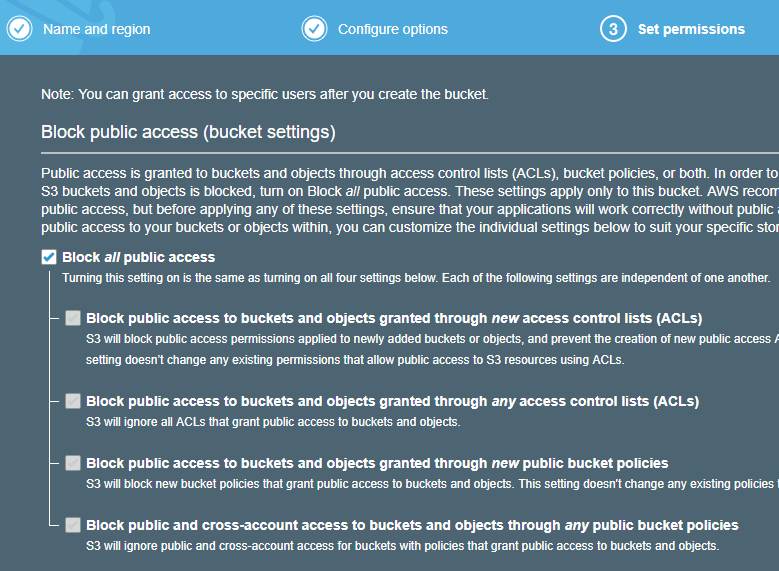
- Click Next
- Review
- Click Create Bucket
- You should then see the new bucket in your S3 console
- Create the repository folder in the bucket.
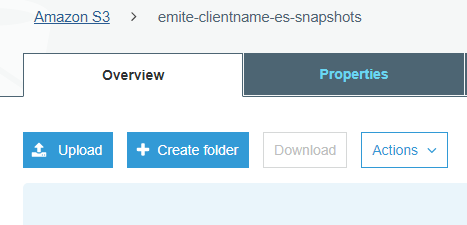
- Go to AWS Console > S3
- Click the bucket that was created earlier (e.g. emite-<clientname>-es-snapshots)
- Click Create Folder
- Name the new folder
- Example: repository
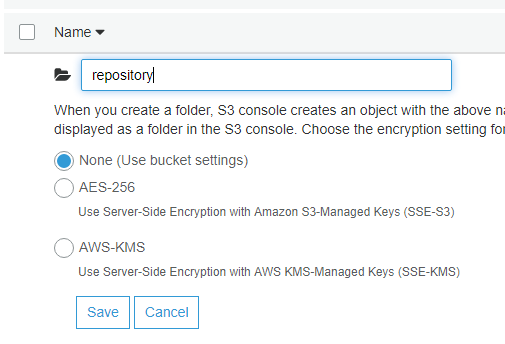
- The full s3 path to the backup folder should now be something like s3://emite-clientname-es-snapshots/repository
- We'll be using this location as example throughtout this guide.
- Go to AWS Console > S3
- Send emite the full backup location
Create IAM Role
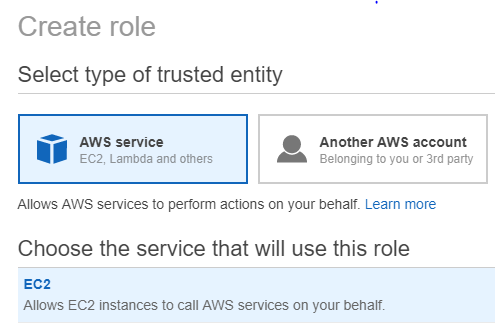
- Go to IAM > Roles > Create Role
- Type of trusted identity: AWS Service
- Service that will use the role: EC2
- We'll change this to elasticsearch later
- Skip attaching permissions policy for now
- You can skip adding tags
- Review:
- Role Name: emite-elasticsearch-s3repo
- Description: Role to setup S3 repository for elasticsearch
- Click Create Role
- This should now create the new role in IAM > Roles
- Go back to IAM > Roles
- Click the emite-elasticsearch-s3repo role
- You should see the summary for this role
- Take note the role ARN. It should be something like arn:aws:iam::<AWS Account Number>:role/emite-elasticsearch-s3repo
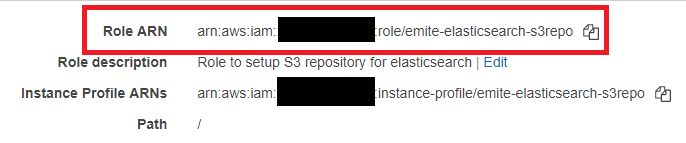
- We'll use this later in the policy
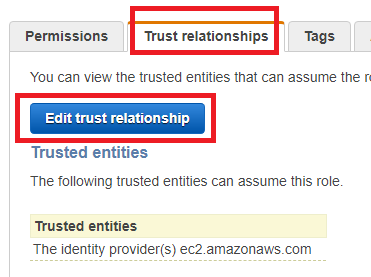
- Click the Trust Relationships Tab > Edit trust relationship
- This will load up a Json file, replace ec2.amazonaws.com with es.amazonaws.com:
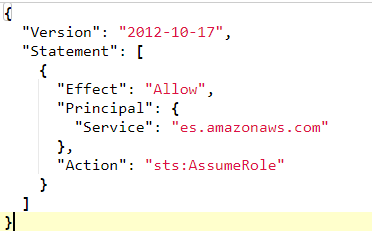
- Click Update Trust Policy
- Send eMite the full role ARN
- Example: arn:aws:iam::<YourAWSAccountID>:role/emite-elasticsearch-s3repo
Create IAM Policy
- Go to IAM > Policies > Create Policy
Click the JSON tab and paste the following policy template:
{ "Version": "2012-10-17", "Statement": [{ "Sid": "VisualEditor0", "Effect": "Allow", "Action": [ "iam:PassRole", "s3:ListBucket", "es:ESHttpPut" ], "Resource": [ "arn:aws:s3:::s3repo-bucket", "s3repo-role-arn", "elasticsearch-arn/*" ] }, { "Sid": "VisualEditor1", "Effect": "Allow", "Action": [ "s3:PutObject", "s3:GetObject", "s3:DeleteObject" ], "Resource": "arn:aws:s3:::s3repo-location/*" } ] }- Now replace the values in the "Resource" of the policy:
- s3repo-bucket: the name of the s3 bucket you'll use to store the repository
- E.g. emite-clientname-es-snapshots
- s3repo-role-arn: the full arn of the role you created in the previous step
- E.g. arn:aws:iam::134921829281:role/emite-elasticsearch-s3repo
- elasticsearch-arn: the full arn of the domain in the prerequisite
- E.g. arn:aws:es:ap-southeast-2:134921829281:domain/emite-kinesis-connect
- s3repo-location: the full name of the s3 backup location\
- E.g. emite-clientname-es-snapshots/repository
- s3repo-bucket: the name of the s3 bucket you'll use to store the repository
Using our example values, you should have something like this in the policy:
{
    "Version": "2012-10-17",
    "Statement": [{
            "Sid": "VisualEditor0",
            "Effect": "Allow",
            "Action": [
                "iam:PassRole",
                "s3:ListBucket",
                "es:ESHttpPut"
            ],
            "Resource": [
                "arn:aws:s3:::emite-clientname-es-snapshots",
                "arn:aws:iam::134921829281:role/emite-elasticsearch-s3repo",
                "arn:aws:es:ap-southeast-2:134921829281:domain/emite-kinesis-connect/*"
            ]
        }, {
            "Sid": "VisualEditor1",
            "Effect": "Allow",
            "Action": [
                "s3:PutObject",
                "s3:GetObject",
                "s3:DeleteObject"
            ],
            "Resource": "arn:aws:s3:::emite-clientname-es-snapshots/repository/*"
        }
    ]
}
Click Review Policy- Policy Name: emite-elasticsearch-s3repo-policy
- Description: Policy to allow elasticsearch access to S3 as repository
- Click Create Policy
- Attach Policy to the new Role
- Go back to IAM > Roles
- Click the emite-elasticsearch-s3repo role
- Under Permissions Tab - click Attach policies
- Select the emite-elasticsearch-s3repo-policy, click Attach Policy
- Attach Policy to the eMite Role
- As part of the eMite deployment - there should be another IAM role used by eMite to gain access to Amazon Connect / Kinesis streams
- For eMite-hosted (SaaS deployment) - this will be the role that the eMite server assumes to gain access to your AWS resources
- If you're not sure about the IAM Role - please contact eMite team
- The eMite team will check the eMite server/adapter config and send you back the name of the IAM Role
- For customer-hosted deployment - this will the IAM Role attached to the eMite server
- For eMite-hosted (SaaS deployment) - this will be the role that the eMite server assumes to gain access to your AWS resources
- Go back to IAM > Roles
- Click the role
- Under Permissions Tab - click Attach policies
- Select the emite-elasticsearch-s3repo-policy, click Attach Policy
- As part of the eMite deployment - there should be another IAM role used by eMite to gain access to Amazon Connect / Kinesis streams
Recap - What to send to eMite team
- Send the full backup location
- Send the full role ARN
- Example: arn:aws:iam::<YourAWSAccountID>:role/emite-elasticsearch-s3repo
Using the above details, the eMite team will be able to configure your elasticsearch (via the eMite server) to use the S3 location as Elasticsearch snapshot repository.
We'll then be able to take the snapshot. The snapshot can be used to transfer data to another domain
eMite Side - Creating the Repository
- Install Postman App on the server
- Get the keys / token details by assuming a role via AWS CLI call to STS
- Open powershell
- aws sts assume-role --role-arn "<ARN of AWS Role used by adapters>" --role-session-name AWSCLI-Session --external-id <external id>
- ARN of AWS Role used by adapters - use the arn configured on the Kinesis/Amazon Connect adapters
- external id - use external id configured on the Kinesis/Amazon Connect adapters
- STS should respond back with a temporary set of keys and token like the example below

- Take note of the AccessKeyId, SecretAccessKey, SessionToken
- Open Postman App - Create New Request
- Authorization Tab
- Set Type: AWS Signature
- Set AccessKey
- Set SecretKey
- Set AWS Region: current region, i.e. us-east-1
- Set Service Name: es
- Set Session Token
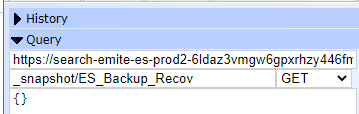
- Body Tab
- Set Request Type to PUT

- <Elasticsearch URL>/_snapshot/ES_Backup_Recov
- Body Details:
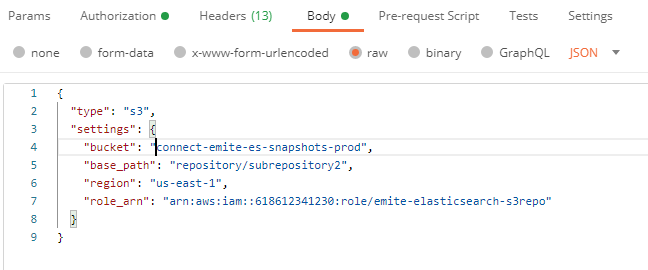
- Set raw - JSON
- Add the following:
- {"type": "s3","settings": {"bucket": "<bucket name>","base_path": "<repository/subrepository2>","region": "<current region, i.e. us-east-1>","role_arn": "<full role ARN, i.e. arn:aws:iam::<CustomerAWSAccountId>:role/emite-elasticsearch-s3repo>"}}
- bucket - get the bucket name from full backup location
- base_path - the additional path on the full backup location
- role_arn - the full role ARN
- Set Request Type to PUT
- Run the request
- It should return acknowledged: true
- Check repository
- Go to Elasticsearch Head on Chrome
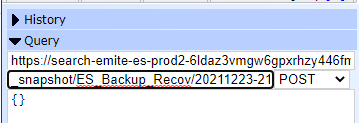
- Take a snapshot
- POST <Elasticsearch URL>/_snapshot/ES_Backup_Recov/<snapshot name>
- It should return acknowledged: true
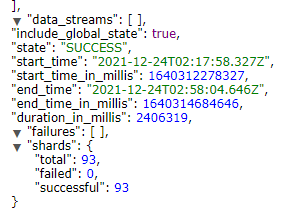
- Check the snapshot name, then wait for the State to be SUCCESS
-
- POST <Elasticsearch URL>/_snapshot/ES_Backup_Recov/<snapshot name>
- The snapshot has been completed at this point.